

The review below has been kindly written by Tracy Balsden. You can find Tracy on Instagram @daydream_sewing
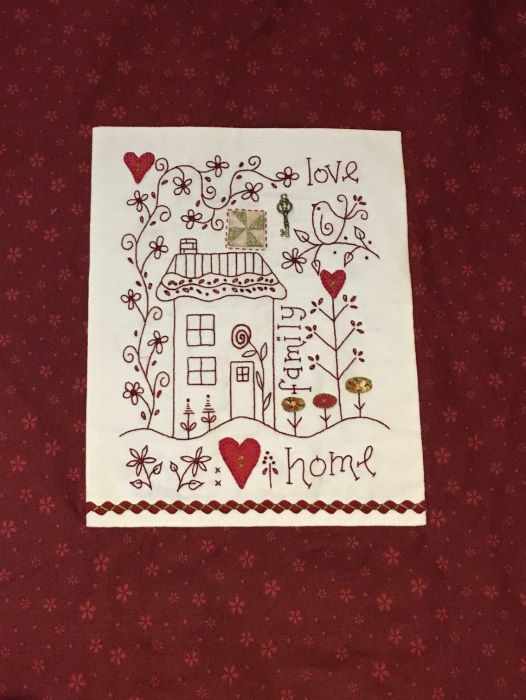
The latest product for review is the Love, Family, Home kit designed by Gail Pan.
Being part of Poppy Patch Posse has involved me stitching and reviewing a product from Poppy Patch, I’ll be reviewing a product every three months which is very exciting as I get to stitch a pattern/kit of my choice and share the process with you all along the way.
This is my first review as a posse member and I hope you all like the end result as much as I do. I love Gail’s patterns they’re always a pleasure to stitch, if you’ve been following my progress on instagram over the last couple of months you’ll have seen my posts walking you through how I went about stitching this gorgeous kit provided by Poppy Patch.
Within the kit I received burgundy cottage garden threads, DMC Perle, lace trim, Ric-Rac and fabrics which beautifully complimented the threads. I did choose to add some sage green Ric-Rak from my stash too but there was ample trim included if you didn’t want to add an alternative colours of your own.
Preparing your fabric:- The first thing I did on opening my kit was to spray all my fabrics with best press (alternative is a June Tailor starch savvy) and iron on a medium heat. I cut the cream fabric for the stitchery to size, I always make sure I cut any fabrics I’m going to stitch larger than the finished piece as a lot of fabrics tend to shrink and fray slightly whilst stitching, I cut to size at the end when all stitching is completed.


Transferring Design: I used a light box to transfer the design which was clear and easy to trace through to my fabric, you’d be able to tape this design to a window if you don’t own a light box as the designs very clear and was easy to follow as long as you pin or tape it to stop any pattern movement. I measured all four sides of the fabric a couple times just to make sure it was as central on the pattern as possible before transferring the design. To do this I use very small slow strokes with a pencil, I always use an iron on interfacing on the back of my stitcheries as it helps stop stray threads from being seen on the front and it also helps stop the fabric from puckering. I cut the interfacing to the size of my stitchery and ironed it onto the reverse of my work, I then ironed the vlieseline on after I’d drawn the design onto the fabric using a medium heat, too hot and you may risk melting the interfacing.

I used a John James Chenille 24 needle on this project (I’ll often use a size 26 too as they’re a bit finer) and I always use a hoop on my work.
I’ve used a back stitch for most of the embroidery, my stitches are about half the length of a grain of rice, (if I’m working on something very intricate I may reduce the size of my stitches even more ) and I’ve satin stitched the centre of the flowers, when working on satin stitch I’ll always work the outline of the area to be satin stitch first, I then start in the centre of this area and work out to each side.


I really wanted to make a 3/4” pin wheel, I love the 3d effect the appliqué has given. I’ve used the appliquick method (Lynette Anderson has an apliquick tool) for all the appliqué pieces and have blanket stitched them in place by hand. If you’ve never used appliquick paper before give it a try, I find it makes appliqué so much easier and quicker, just trace the pattern onto the appliquick paper (making sure not to draw on the glue side) cut smoothly on the line, try not to get any zagged edges as this will show on the front, then iron the cut shape onto the back of your fabric (the papers very thin and stays in your project) cut around the outer edge leaving just enough fabric to turn, use a glue pen to go around the outer edge, working a small area at a time as if you use the glue pen too far ahead the paper may get soft making the job much harder.


Then the fun bit…
The apliquick tools are then used to carefully fold the fabric over the apliquick paper, I tend to iron once I’ve done this, your pieces are then ready to stitch in place, I use Roxanne glue to hold them in place ready to stitch, I find this much easier than pins as there’s no movement. The tiny pin-wheel was machine pieced using a 1.5 stitch length and I used a Bloc-Loc to cut the half square triangles to size, they make cutting blocks to size so much easier, they come in a variety of shapes and sizes including ones to do flying geese.


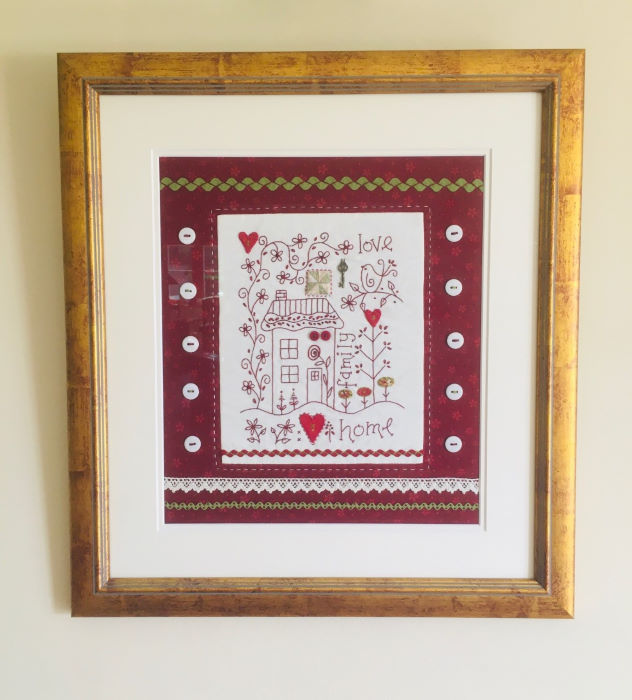
After the redwork and appliqué was completed I started work on the borders, for this I used the gorgeous warm red fabric that was included in the kit from @poppypatch2015 and as I said earlier I did add some sage green ric rac from my stash at this point as I always love the combination of reds and greens together.
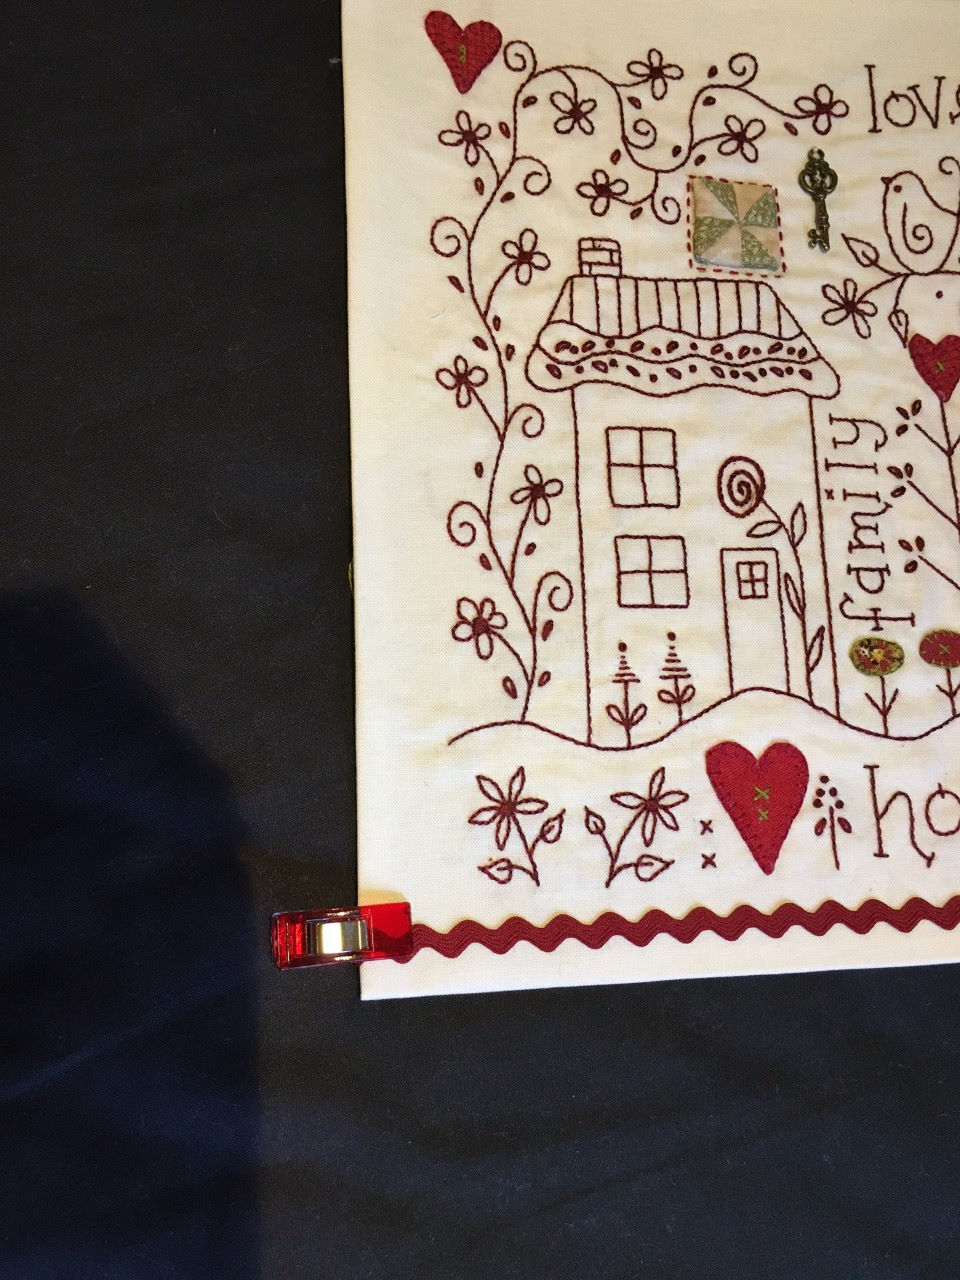
I then added the lace trim and Ric-Rak that was included with the kit, these were attached by hand using 2 strands of the burgundy cottage garden thread, the lace was attached using a running stitch and I used colonial knots as opposed to French knots to attach the bottom Ric-Rak, I feel colonial knots sit a bit flatter than French knots and finally I used a back stitch to attach the top Ric-Rak.
To finish the picture off I found some little cream buttons just like the ones in the pattern and I used alternative red and sage green thread to attach them, I think the finishing touch is the little antique gold key charm, it’s just perfect for the project. I decided to have my finished wall hanging framed as in Gail’s pattern.
I Look forward to reviewing and sharing my next project with you all very soon, love and hugs Tracy xx

That looks absolutely lovely!
This is beautiful Tracy ❤️…and I love all your personalisations too!