Gold and Grey Princess embroidery kit (designed by Tamar Nahir Yanai) product review
The review below has been kindly written by Tracy Balsden. You can find Tracy on Instagram @daydream_sewing
Hello again, wow where are the months going it only seems like yesterday I wrote my first review
for the Poppy Patch Posse. For this quarterly review I found myself stitching a beautiful Embroidery called “Gold & Gray Princess” which is a design by Tamar-Nahir-Yanai, this was a first for me from this designer. The kit included illustrated colour stitch guide, DMC embroidery threads, a needle and preprinted fabric (bonus, no transfer to worry about ?) and the fabric even had stabilizer already ironed onto the reverse so I could start stitching Immediately.
I started by hooping the fabric, I used a lap stand for the first time to hold my embroidery hoop I found this really helpful and will definitely be using it again in the future.
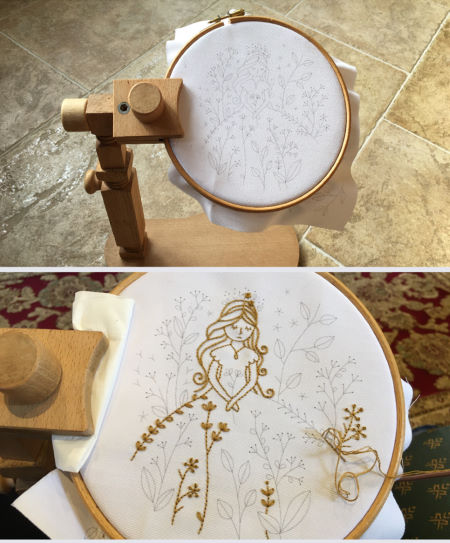
I used two strands of the DMC thread to stitch the design but did use one strand for the more delicate areas, as suggested in the instructions. Eight different stitches were used to complete the design and they’re all explained with excellent diagrams to help you stitch them correctly, the only stitches I changed were the French knots, I used colonial knots as I feel they sit nicer on the fabric and I used a stem stitch for her hair.
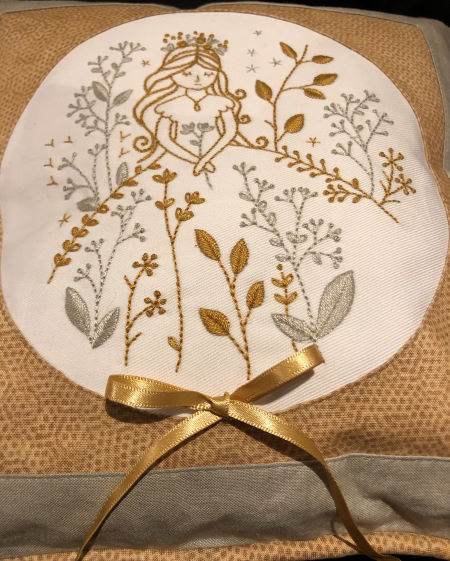
Once finished I thought this would make an excellent ring cushion and with a wedding in the family looming what better way to use this gorgeous lady.
I sent the completed embroidery back to Sam at Poppy Patch who kindly put together a selection of coordinating fabrics for me to choose from and then I had to work out how to do justice to this gorgeous embroidery.
I put pen to paper, sketched up a few ideas and began to sew…
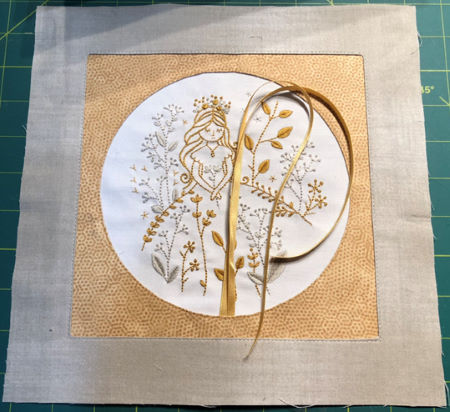
I knew I wanted to have a circular frame around the embroidery so I used appliquick paper, cut out a circle and used the appliquick method to turn back the fabric edges creating a circle. I then used my 10D foot to sew around the circle catching a thin satin ribbon at the bottom of the embroidery which will hold the all-important rings once finished.

I then added a second border of silver gray fabric using the same method as the circular one.
To finish the cushion, I added piping which I made using the gold fabric To make the piping I cut my fabric on the bias and used a 12C foot, when stitching together I snipped the corners of the piping so as to make it flow around the corners of the cushion easier.
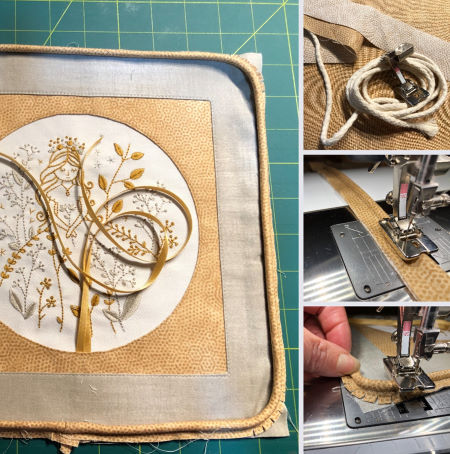
And when not in use as a ring cushion the ribbon looks beautiful just tied in a simple bow.
I hope you all enjoy reading my review as much as I have stitching it and designing the cushion,
Love Tracy xx


